
New Fishroom
Present from My Family
After retiring and moving house (which was over 2 years later), it then took us a year to get the new house and garden sorted before I could start work on my latest (and last hopefully) fishroom ( started April 2014).
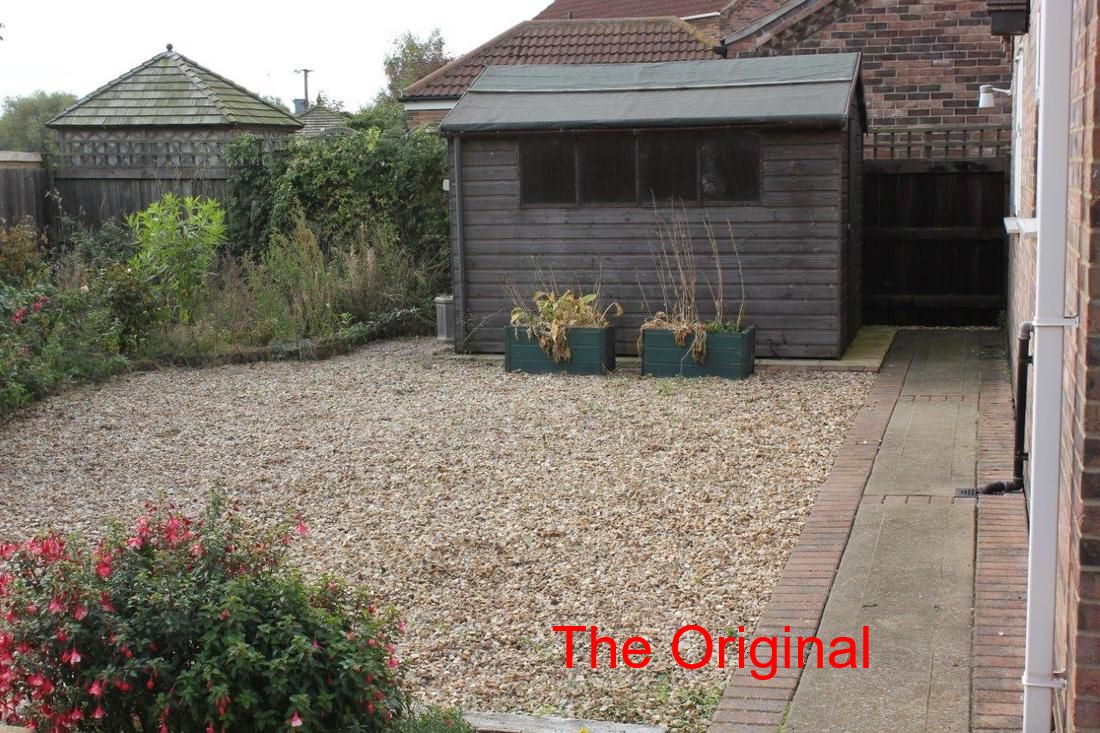
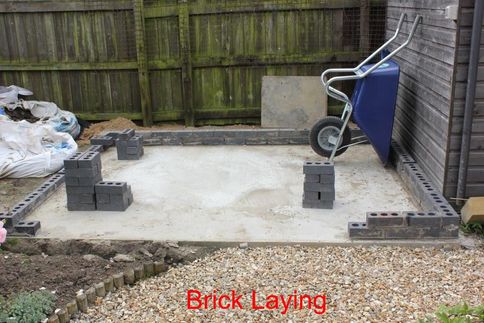
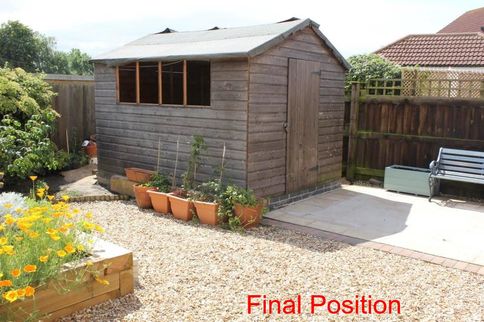
This was a garden shed 10ft x 8ft (3m x 2.4m), that I had to move away from the house (only 3-4ft gap initially) as it was blocking light from one of our bedroom windows. Therefore I had to lay a new concrete base, and then build a small wall (2 bricks high) for the shed to fit on and be fixed down. My son, Michael, helped me move the shed, which was not easy, even it we had dismantled it into sections, as the roof weighed a lot.
|
|
|
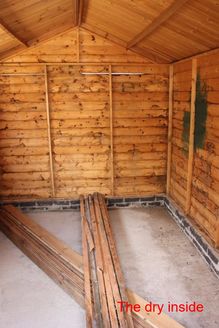
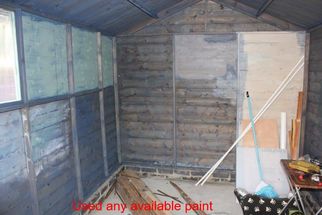
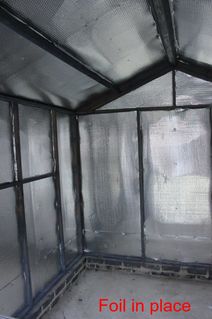
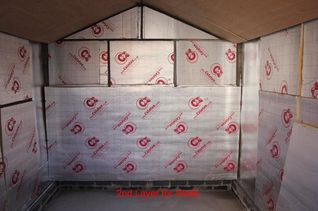
The next steps were to reduce the size of the window (reduced heat loss), paint the inside woodwork, and fix a covering of aluminium foil insulation. The foil acts as a waterproof membrane as well as improving the overall insulation.
|
|
|
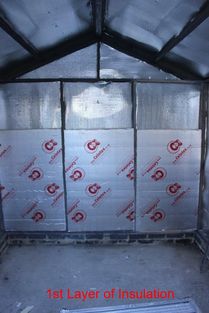
Once the paint had dried, I could fix Celotex insulation boards to walls and ceiling. I fitted the insulation Celotex (this material will not absorb water/moisture, unlike polystyrene). 2" (5cm) on the ceiling and 4" (10cm) on the walls, but only 2" (5cm) on the door. This was then all covered with plywood sheets, to cover all the joins and give a better appearance.
|
|

|
|
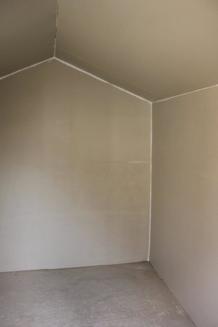
Next job was to paint all the plywood a nice creamy white colour, which will help to reflect the light in the room. I plan to use LED strips for lighting, though I know that Killies are very happy in a low light environment, I like to see my fish.
Plus I needed to silicone all the joints, which will produce another vapour barrier. This will help stop the warm water carrying air from accessing the colder outer walls (i.e. stops condensation amongst the insulation). |

|
|
 Stands + Floor Insulation
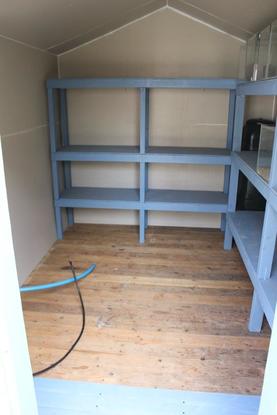
Next step was to build and paint the 2 stands (both 18" deep), with 3 sections for tanks, and room on the floor for large plastic boxes to hold all the bits and pieces that an aquarist needs (or acquires with time). The stands were designed for the bottom of the legs to be on the concrete and not the wooden floor.
Therefore the joists for the flooring was built around the stand legs. Once the joists were in place I used aluminium foil insulation and 2" Celotex to fill in the gaps. Next step was to fit the interlocking floor boards (cutting them as required around the legs of the stands) and screwing them down to the joists.
Note the 100 litre water butt in the far right corner. My idea was to use this to hold rainwater (initially stored in 2 x 200 litre butts at the back of the shed), and allow it to come up to temperature in the fishroom, before using it for water changes. See what happened later.
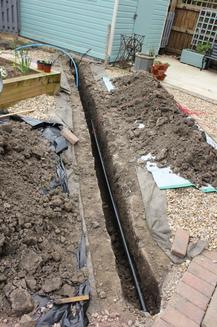
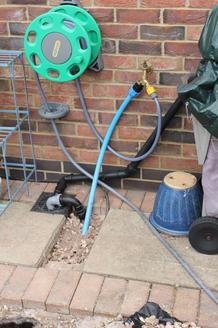
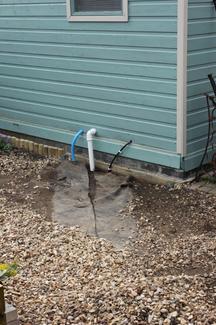
Now for some hard work. I dug an 18" deep trench from the house (next to the outside tap) across the back garden to the shed. In this was laid the electrical armoured cable, the blue water pipe and the 40mm plastic drain pipe. The electrical cable was connected up by a qualified electrician to a circuit breaker inside the shed, and then to 2 double plug outlets. As can be seen from the pictures below, the fishroom now has electricity, tapwater (but can be isolated if required), and a waste pipe to the drain.
|
|

|
|
|
You may have already noticed on some of the previous pictures that the shed had also been painted on the outside (thanks to my wife, Ann). Plus I fitted a trellace to the wall for a clematis (Hagley Hybrid) to grow up on during the summer.
Last jobs in the garden was to build a second raised bed using new sleepers, and this was planted with a selection of plants. Plus fix gates to either side of the shed, for storing the large refuse dustbin, and access to the storage area behind the shed. The old treadmill sewing machine still needs a top fitting that will be used for displaying pots of plants. Still having a problem with this as all the tops we have tried end up bowing to some degree or other. |

Finished Fishroom
|
|
As you can see from the image to the right, the floor is now complete. I used the existing floorboards from the original shed, but some were in very bad condition so had to be replaced. These are the ones painted blue at the front. Also shown on the floor are the blue tapwater pipe and the electrical cable.
Image on the far right shows that a vinyl floor covering has been laid (thanks to my lovely wife, as I am terrible when it comes to delicate tasks). I then used silicone sealer around all the edges, including the legs of the stand. So if I ever spill any water (if I would?) then it is easy to mop up. |
|
|
|
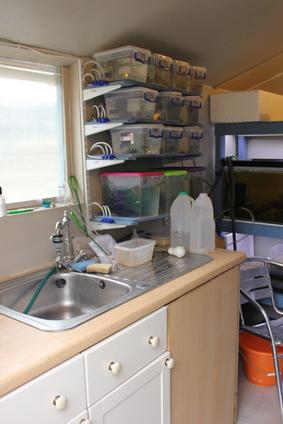
Next job was to plumb in the kitchen sink unit that I had kept from our kitchen revamp we had done, just after we moved in. Then I had to plumb in the tapwater (of course only cold water), and the waste pipe. Tried to fit a U-bend under the sink but then the water in the sink would not run away. Then realised that there was no need for a U-bend, as the waste pipe was underground for most of it's length and was full of water so in fact a U-bend itself. What cannot be seen in the picture, is that under the draining board side of the unit (behind the wooden panel) is a 200 litre water butt, which holds tapwater, treated and raised to 20°C for use in my tanks. This is carried out by using a relatively priced 1000 l/hr pump and some 12mm piping. |
|
|
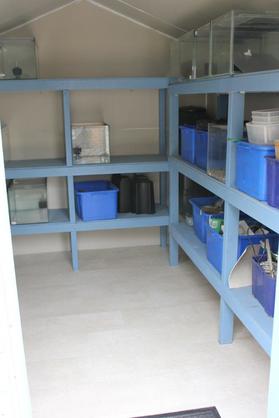
The shelving supports were fitted to the vertical struts in the original shed. These 10 plastic containers, bought for 99p each from Poundstretchers, are used for rearing fry. Each container has a small foam filter, which is more for water circulation rather than filtration, as the tanks are cleaned regularly and water changed. The three lower plastic containers with the coloured lids (6.7 litre each by Whambox and was purchased at The Range for £9.99 for 4), are used for breeding small groups or pairs of killies. Again each with a air filter. |

|
|
Then I started to sort out the tanks onto the stands. The first and second tiers are all glass tanks, with plastic tanks on the top.
Next step was to add an air distribution system, but like many, I was in a hurry (2015 NEY auction was coming up) so just used standard 4mm air tubing throughout. I had planned to redo this at some stage, but 18 months later it is still the same. Note the blue boxes on the floor which are used for general storage. |

Some Tanks in Place
|

...and even more Tanks
|
|
The corner next the door is a very busy area, as that was where the electrical circuit breaker was fixed. Also my Hailea piston air pump is fitted,70 l/min and brought from my old fishroom, but it was struggling so recently upgraded it to 130 l/min model. Notice the old corner "bathroom cabinet" which I now use as a brine shrimp hatchery. Also the storage unit on the wall, holds 16 mini containers. These are either filled with peat/coir or treated water for egg incubation. |

...a very busy corner.
|

a Brine Shrimp Hatchery
|
Well that is about all for the moment on the new fishroom. Various thing have changed over the past 18 months, but I need to take some more photos then I can show you what the system is like now.
|
The fishroom as of February 2017.
As can be seen on the far end stand, I now have glass tanks on the top and these are housing 4 sets of Nothobranchius breeding groups. The side stand is now nearly full of tanks, but still room for 3 more. The top tier plastic containers house pairs of killies for breeding, with a mop and/or peat container for the eggs. |

|

|
|
I did mention earlier about the 100 litre water butt in the back right-hand corner, well it is still there as I cannot get it out. Late last year it started to leak and I could not see where it was coming from or get access to fix it. Therefore it had to be replaced, and I bought a 84 litre plastic box (see in picture, bottom left of the stand, behind the chair), that would fit in the available space.
Still works well, and I can fill it by pumping from my outside water butts. The pump in the container allows me to fill any tank without having to use buckets. Same for the tapwater container (200 litre) under the sink unit. |

|
The white polystyrene box (top left of stand) is nearly full with bags of peat/coir containing eggs. This area of the fishroom is maintained at approx. 25°C which is ideal. Now I am running out of space in the box, and hope to collect a lot more eggs over the next few months, so I am looking at alternatives. Brian Watters (AKA JAKA) made a specially built incubator for his Nothobranchius eggs, but that was a work of art, so mine will be a bit more simplistic. I have an area at the end of the sink unit where I can fit something without it being in the way. Details to follow.
